Bean to Bar Chocolate Making: Your Ultimate Guide
There's something uniquely satisfying about taking raw ingredients and transforming them into a culinary masterpiece. For chocolate lovers, this journey culminates in the art of bean to bar chocolate making. Moving beyond simply melting store-bought chocolate, the bean to bar process allows you to control every single step, from selecting premium cacao beans to crafting a finished bar with unparalleled flavor and texture. If you're curious about the art of crafting chocolate from its most fundamental components, this ultimate guide will walk you through how to make chocolate bean to bar, empowering you to create truly artisanal confections.
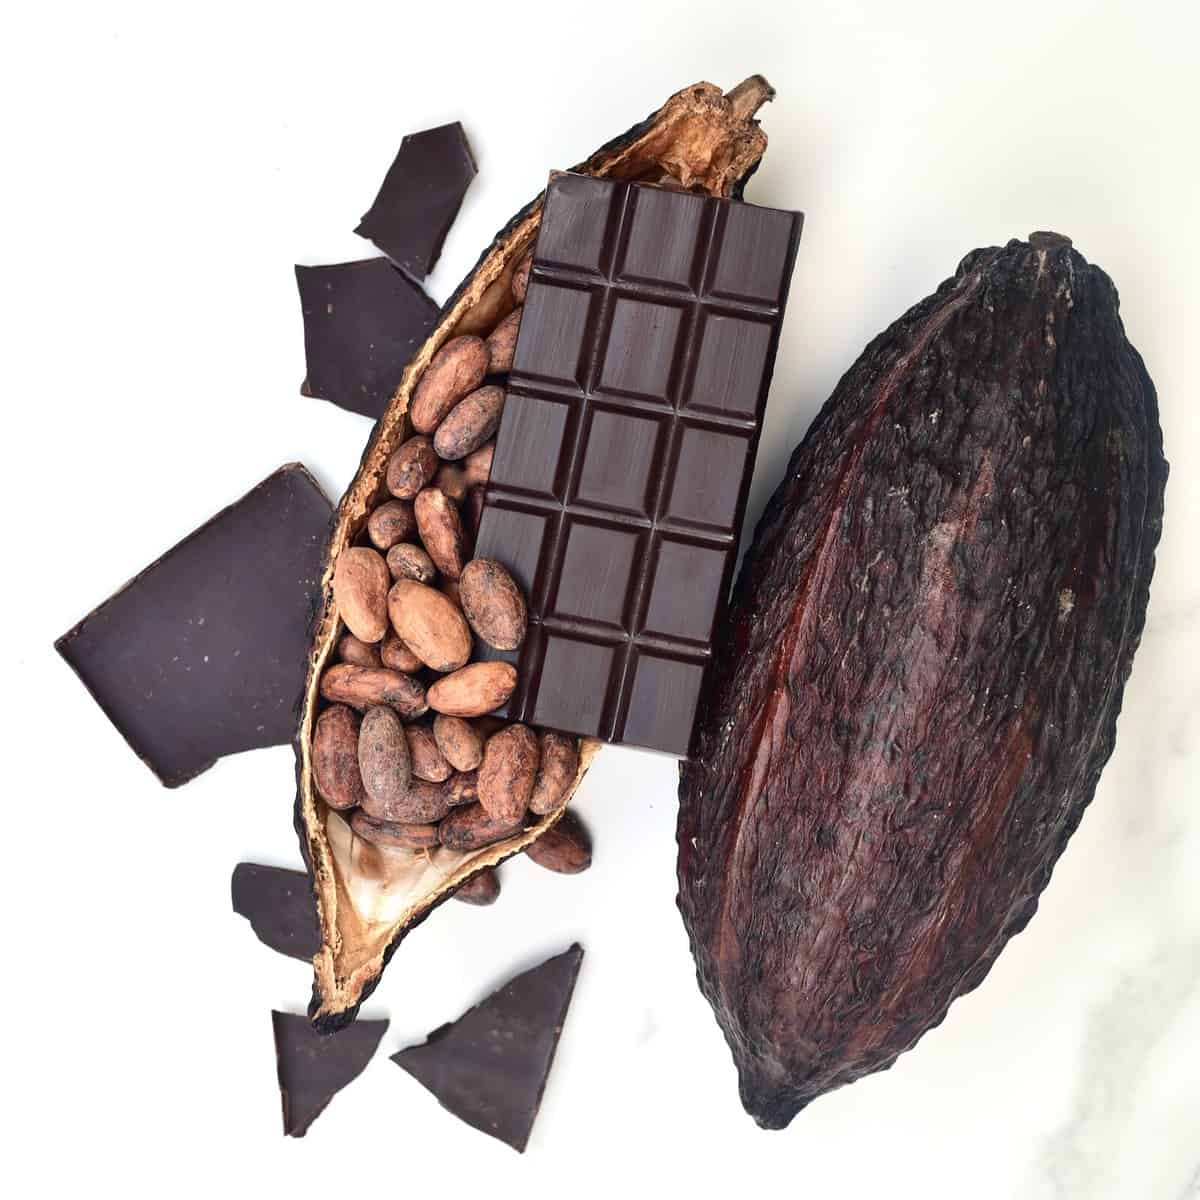
The Allure of Bean to Bar: Why Make Your Own Chocolate?
The movement towards bean to bar chocolate making isn't just a trend; it's a testament to a growing desire for authenticity, quality, and a deeper understanding of our food. When you learn how to make chocolate bean to bar, you unlock a world of benefits:
- Unparalleled Flavor Control: From the roast profile of your cacao beans to the amount and type of sugar you add, every decision impacts the final flavor. You can highlight nutty notes, fruity undertones, or deep chocolatey richness, creating a bar that perfectly suits your palate.
- Ingredient Transparency: Say goodbye to questionable additives and artificial flavors. You know exactly what goes into your chocolate – typically just cacao and sugar. This is especially appealing for those with dietary restrictions or a preference for natural ingredients.
- A Deeper Appreciation: Understanding the intricate process, the effort, and the science behind chocolate making fosters a profound appreciation for every bite. It transforms chocolate from a simple treat into an experience.
- The Joy of Craftsmanship: There's immense satisfaction in creating something delicious from scratch. The bean to bar journey is a meditative and rewarding craft that engages all your senses.
Essential Equipment and Ingredients for Your Bean-to-Bar Journey
Embarking on the bean to bar adventure requires a few specialized tools, though many beginners start with modified kitchen equipment. Understanding the purpose of each item is key to successfully learning how to make chocolate bean to bar.
Key Ingredients:
- Cacao Beans: The heart of your chocolate. Source high-quality, unroasted cacao beans from reputable suppliers. Origin matters significantly; beans from Ecuador, Madagascar, Peru, or Nicaragua each offer distinct flavor profiles. Experiment with different origins to discover your favorites.
- Sugar: Typically cane sugar is used, but you can explore coconut sugar, maple sugar, or even alternative sweeteners. The quantity will depend on your desired sweetness and the natural bitterness of the beans.
- Optional Additions:
- Cocoa Butter: Can be added to achieve a smoother texture or to lighten a dark chocolate.
- Lecithin (Soy or Sunflower): An emulsifier that can improve flow properties and mouthfeel, especially in larger batches.
- Vanilla Bean/Extract: A classic pairing that can enhance chocolate flavor, though often omitted in single-origin bars to let the cacao shine.
Essential Equipment:
- Roaster: A critical step for flavor development. Options include a home oven, a coffee roaster (modified), or a dedicated cacao roaster. Even roasting is paramount.
- Cacao Cracker & Winnower: After roasting, you need to crack the beans and separate the nibs (the inner part) from the papery husks (chaff). A hand-cranked cracker and a modified shop vac or a purpose-built winnower are common setups.
- Melanger/Refiner: This is the workhorse of bean to bar. A melanger uses granite stones to grind the cacao nibs into a fine liquor, simultaneously refining particle size and conching. This process can take anywhere from 24 to 72 hours.
- Tempering Machine (Optional, but Recommended): While manual tempering is possible, a tempering machine provides precise temperature control, crucial for achieving chocolate with a perfect snap, glossy finish, and no bloom.
- Chocolate Molds: High-quality polycarbonate molds are best for professional-looking bars.
- Basic Kitchen Tools: Digital scale, instant-read thermometer, spatulas, bowls, double boiler (if tempering manually).
Step-by-Step Guide: How to Make Chocolate Bean to Bar
Now that you have your ingredients and equipment, let's dive into the fascinating process of how to make chocolate bean to bar from scratch.
1. Sourcing & Selection
Begin by sourcing high-quality cacao beans. Research different origins and their typical flavor notes. Start with a smaller batch to experiment before committing to larger quantities.
2. Roasting
Roasting develops the complex flavors in cacao. Spread your beans in a single layer on a baking sheet (if using an oven) or load them into your roaster. Roasting temperatures typically range from 250-350°F (120-175°C) for 15-45 minutes, depending on the bean type and your desired flavor profile (light, medium, or dark roast). Listen for popping sounds, smell the developing aromas, and visually inspect the beans for an even roast. Let them cool completely.
3. Cracking & Winnowing
Once cool, crack the roasted beans to separate the nibs from the husks. A simple hand cracker or a modified blender can do the trick. Then, winnow the beans by using airflow (e.g., a fan or shop vac) to blow away the lighter husks, leaving behind the denser cacao nibs. Clean nibs are crucial for smooth chocolate.
4. Grinding & Refining (Melanging)
This is where the magic truly happens. Add your cacao nibs to the melanger. As the granite stones turn, they will grind the nibs into a thick paste, which will gradually become a liquid known as chocolate liquor. After a few hours, start slowly adding your sugar. The melanger will continue to reduce the particle size of both the cacao and sugar, resulting in an incredibly smooth texture. This process can take 24-72 hours, depending on your melanger and desired fineness.
5. Conching
Conching is often integrated into the melanging process. It involves continuous agitation of the chocolate liquor, which helps evaporate unwanted volatile acids, reduces bitterness, develops deeper flavors, and improves the chocolate's texture and flow. The duration of conching significantly impacts the final taste and mouthfeel.
6. Tempering
Tempering is arguably the most crucial step for the finished chocolate's appearance and stability. It involves carefully heating, cooling, and reheating the chocolate to specific temperatures to stabilize the cocoa butter crystals. Proper tempering ensures your chocolate has a beautiful sheen, a satisfying snap, and is resistant to blooming (white streaks caused by fat migration). There are several methods, including seeding, tablaring, and using a tempering machine. Dark chocolate typically tempers around 88-91°F (31-33°C).
7. Molding & Packaging
Once tempered, pour the liquid chocolate into your clean, dry molds. Tap the molds gently to release any air bubbles. Allow the chocolate to cool and set completely at room temperature or in a cool, dry place. Once fully set, demold the bars, wrap them, and prepare to enjoy your homemade creation!
Mastering the Nuances: Tips for Perfecting Your Bean-to-Bar Craft
The journey of how to make chocolate bean to bar is one of continuous learning and refinement. Here are some tips to help you perfect your craft:
- Experiment with Roasting: Different roast levels bring out different flavors. Keep detailed notes on time, temperature, and bean characteristics to replicate or refine your favorite profiles.
- Patience with Refining: Don't rush the melanging process. The longer the chocolate refines, the smoother its texture will be. Taste periodically to assess the texture.
- Precise Tempering: Invest in a good thermometer and practice tempering. It’s the difference between dull, crumbly chocolate and a professional-looking, snappy bar. For a deeper dive into achieving that perfect snap and sheen, explore our guide on Mastering Bean to Bar: Craft Perfect Homemade Chocolate.
- Cleanliness is Key: Chocolate is sensitive to moisture and contaminants. Ensure all your equipment is spotless and dry to prevent issues like seizing or off-flavors.
- Record Keeping: Document every step – bean origin, roast profile, refining time, sugar percentage, tempering temperatures. This allows you to learn from each batch and consistently improve.
- Taste, Taste, Taste: Develop your palate. Pay attention to how flavors evolve at each stage. This will guide your decisions and help you understand the impact of each process.
Understanding the entire journey from source to finished product can elevate your skills; read more in From Cacao Bean to Bar: The Art of Crafting Chocolate.
Conclusion
Learning how to make chocolate bean to bar is an incredibly rewarding endeavor that transforms a simple treat into a profound culinary experience. From the initial selection of raw cacao beans to the final tempering and molding, each step is an opportunity to learn, create, and customize. While it requires patience and a bit of specialized equipment, the satisfaction of producing your own unique, high-quality chocolate bars is immense. Embrace the journey, experiment with flavors, and savor the rich, complex reward of truly artisanal chocolate made right in your own home.
